We’ve all been there – excitedly unboxing a brand new Bialetti Moka pot, ready to indulge in the rich aroma and flavor of freshly brewed coffee. But hold on, before we jump right into the brewing process, it’s important to season the Moka pot properly to ensure optimal performance and longevity. In this article, we’ll guide you through the simple yet crucial steps to season your new Bialetti Moka pot, allowing you to enjoy a perfect cup of joe every time. So grab your favorite coffee beans and let’s get started!
Preparing the Moka Pot
Wash the Moka pot
Before using your new Bialetti Moka pot for the first time, it is essential to give it a thorough wash. Rinse the pot with warm water and mild dish soap, using a non-abrasive sponge or cloth to gently clean the inside and outside of the pot. Ensure that all traces of soap are rinsed off, as any residues can affect the taste of your coffee.
Disassemble the Moka pot
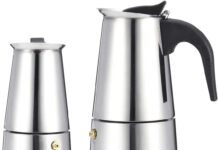
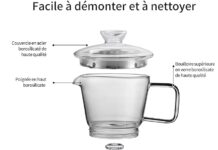
To prepare the Moka pot for seasoning and brewing, disassemble it into its three main parts: the bottom chamber (water reservoir), the funnel (coffee basket), and the top chamber (where the brewed coffee collects). Carefully unscrew the top chamber from the bottom chamber, removing the funnel in the process. This disassembly will make it easier to clean and season the individual parts.
Check for any defects
While you have the Moka pot disassembled, take a moment to inspect each component for any defects or damage. Look for cracks, dents, or imperfections that may affect the pot’s performance. It is crucial to address any issues at this stage before seasoning and brewing to ensure optimal results. If you notice any defects, contact the manufacturer for assistance or consider replacing the faulty part.
Choosing the Right Coffee
Selecting the coffee grind
Choosing the right coffee grind for your Moka pot is crucial for achieving a delicious, well-extracted cup of coffee. Opt for a medium to medium-fine grind, which allows the water to extract the flavors properly. A grind that is too coarse may result in weak coffee, while a grind that is too fine may lead to over-extraction and bitter flavors. Experiment with different grind sizes to find the perfect one for your taste preferences.
Deciding on the roast level
The roast level of your coffee beans can significantly impact the taste profile of your Moka pot brew. It’s a matter of personal preference, but medium to medium-dark roast beans often work best. These roasts tend to complement the Moka pot’s brewing process, delivering a well-rounded flavor with balanced acidity and body. However, feel free to explore different roast levels to find the one that suits your taste buds.
Consider the coffee-to-water ratio
Determining the right coffee-to-water ratio is crucial for brewing a strong, flavorful cup of coffee in your Moka pot. A general guideline is to use approximately 1 tablespoon of coffee grounds for every 1 ounce (30 mL) of water. However, you can adjust this ratio to your liking. Keep in mind that using too much coffee may result in an overly concentrated brew, while using too little may yield a weak and watery cup. Feel free to experiment with different ratios until you find the perfect balance.
Water for Brewing
Choosing the water
The water you use for brewing plays a significant role in the final taste of your coffee. It is advisable to use filtered or bottled water to ensure a clean and consistent flavor profile. Tap water often contains impurities that can affect the taste of your brew, so opting for higher-quality water will yield better results. Additionally, avoid using distilled water as it lacks the necessary mineral content to extract the coffee’s flavors optimally.
Avoid using tap water
As mentioned earlier, using tap water is not recommended for brewing with a Moka pot. Tap water can contain chlorine, chemicals, and minerals that can alter the taste of your coffee and potentially damage your Moka pot over time. Investing in a water filtration system or using bottled water will enhance the overall quality and taste of your brewed coffee.
Heat the water separately
To ensure proper extraction and a smooth brewing process, it is best to heat the water separately before adding it to the Moka pot. This allows the water to reach the optimal temperature and ensures even heat distribution throughout the brewing process. Heating the water on a stovetop or using an electric kettle are common methods for achieving the desired temperature range of around 195-205°F (90-96°C).
Preheating the Moka Pot
Using the right heat source
When preheating your Moka pot, it is crucial to use the appropriate heat source. Gas stovetops are generally preferred for their precise temperature control, but electric stovetops can work as well. Avoid using an open flame or an induction cooktop, as these can cause uneven heating and potentially damage the Moka pot.
Preheating without coffee grounds
Before seasoning your Moka pot, it is essential to preheat it without any coffee grounds. This step helps ensure that the pot is heated evenly and eliminates any residual odors or flavors from previous uses. Simply assemble the Moka pot without the coffee funnel and run a brewing cycle with only water. This will heat the pot and remove any impurities, leaving it ready for the seasoning process.
Letting it cool before seasoning
After preheating the Moka pot, give it sufficient time to cool down before moving on to the seasoning step. Allowing the pot to cool ensures that the coffee grounds won’t burn immediately upon contact, leading to a bitter taste. Once the pot has reached a comfortable temperature, it is ready for seasoning with freshly ground coffee.
Seasoning the Moka Pot
Add freshly ground coffee
To season your Moka pot, start by adding freshly ground coffee to the coffee funnel. Use the appropriate amount of coffee based on your preferred coffee-to-water ratio. Make sure to distribute the coffee grounds evenly in the funnel, gently leveling the surface without compacting the grounds too tightly. This step ensures proper water flow and thorough extraction during brewing.
Assembling the Moka pot
Once the coffee funnel is filled with freshly ground coffee, carefully insert it into the bottom chamber of the Moka pot. Ensure that the rubber gasket sits properly and create a tight seal between the top and bottom chambers. Screw the top chamber onto the bottom chamber until it is securely fastened, but avoid over-tightening to prevent any potential damage to the pot.
Preventing over-tightening
When assembling the Moka pot, it is important not to over-tighten the chambers. Over-tightening can lead to excessive pressure buildup during brewing, potentially causing leaks, or even damage to the pot. Instead, tighten the chambers firmly by hand, ensuring a secure seal but without applying excessive force. This will allow for a smooth and controlled brewing process.
Brewing the First Pot
Choosing the correct heat intensity
To achieve the perfect brew, it is crucial to find the right heat intensity for your Moka pot. Start by setting your heat source to medium-low. This will ensure a gradual heat buildup and prevent the coffee from brewing too quickly or burning. Adjust the heat intensity as needed during the brewing process to maintain a consistent flow rate and obtain the desired taste and strength.
Observing the brewing process
As the brewing process begins, it is important to keep an eye on the Moka pot to ensure everything is progressing smoothly. You will notice hot water being pushed up through the coffee grounds and collecting in the top chamber. Be attentive to any irregularities such as leaks, excessive steam, or unusual noises, as these might indicate issues with the pot or the brewing process.
Pouring and enjoying the coffee
Once the brewing process is complete, remove the Moka pot from the heat source and let it cool down for a few moments. Use a towel or oven mitt to handle the hot pot safely. When pouring the coffee, start with a gentle flow to prevent any splashing or spilling. Pour the brewed coffee into your favorite cup or mug, and savor the aroma and rich flavors that your carefully brewed Moka pot has produced.
Cleaning and Storing
Disassembling the Moka pot
After enjoying your delicious cup of coffee, it is time to clean and store your Moka pot properly. Begin by disassembling the pot into its three main parts: the bottom chamber, funnel, and top chamber. Unscrew the top chamber from the bottom chamber, removing the funnel in the process. Disassembling the pot allows for thorough cleaning of each component.
Rinsing the parts
Rinse each part of the Moka pot with warm water and mild dish soap, ensuring that any coffee residue is removed. Use a non-abrasive sponge or cloth to clean both the interior and exterior of the pot. Pay close attention to the funnel, as coffee oils can accumulate and affect the taste of future brews. Rinse all parts thoroughly to eliminate any soapy residue before moving on to the next step.
Air-drying and storing properly
After cleaning, it is essential to let all components of the Moka pot air-dry completely. Placing the parts in a dish rack or on a clean towel allows for proper ventilation and prevents any moisture from being trapped. Once dry, reassemble the Moka pot, ensuring a tight but not overly tight seal. Store the pot in a cool, dry place away from direct sunlight or excessive heat to maintain its quality and prolong its lifespan.
Troubleshooting
Potential issues with brewing
While using a Moka pot is generally straightforward, it’s not uncommon to encounter issues during the brewing process. Some common problems include leaks, uneven extraction, or coffee that tastes off. If you experience any of these problems, check the pot’s assembly for a proper seal, adjust the heat intensity, or consider experimenting with different grind sizes or coffee-to-water ratios. Don’t hesitate to consult the manufacturer’s instructions or reach out to customer support for further guidance.
Addressing metallic taste
If you notice a metallic taste in your brewed coffee, it can be attributed to various factors, including the aging of the Moka pot or the presence of mineral deposits. To address this issue, try descaling the Moka pot periodically to remove any mineral buildup. Refer to the manufacturer’s instructions for specific descaling recommendations or use commercially available descaling products. Regular maintenance and cleaning will help prevent a metallic taste in your coffee.
Consulting the manufacturer’s instructions
If you encounter persistent issues or have specific questions about using your Bialetti Moka pot, it is always helpful to consult the manufacturer’s instructions. These instructions provide detailed guidance on the specific model you own, including assembly, brewing techniques, troubleshooting tips, and general maintenance. Familiarizing yourself with the instructions ensures that you are using your Moka pot correctly and maximizing its potential.
Maintaining the Seasoning
Regular cleaning practices
To maintain the seasoning built up on your Moka pot over time, it is essential to clean it regularly following the steps mentioned earlier. By rinsing the pot with warm water and mild dish soap after each use, you can remove any coffee residue that could affect the flavor of future brews. Avoid using harsh detergents or abrasive materials that can strip away the seasoning layer and compromise the taste of your coffee.
Avoiding abrasive materials
While cleaning your Moka pot, it is important to avoid using abrasive materials that can scratch the surface or remove the seasoning. Stick to non-abrasive sponges or cloths to gently clean the pot without damaging its finish. Additionally, be cautious when handling the rubber gasket to prevent tearing or stretching, as a secure seal is crucial for proper brewing.
Re-seasoning as needed
Over time, the seasoning on the Moka pot may wear off due to regular cleaning or extended periods of non-use. If you notice a decline in the flavors of your brewed coffee or experience any off-tastes, it may be time to re-season the pot. Follow the seasoning process mentioned earlier, using freshly ground coffee and allowing the pot to go through a brewing cycle without consuming the coffee produced. Re-seasoning periodically will help maintain the optimal taste and quality of your brewed coffee.
Experimenting with Flavors
Adding different ingredients
One of the joys of using a Moka pot is the ability to experiment with different flavors and ingredients. While the traditional method involves brewing pure coffee, you can enhance your brew by adding spices like cinnamon or nutmeg to the coffee grounds before brewing. This adds a delightful aroma and an extra layer of flavor to your cup. Don’t be afraid to get creative and try different combinations to find your perfect cup of brewed coffee.
Trying flavored coffee
In addition to adding ingredients, you can also experiment with flavored coffee beans or pre-ground flavored coffee. Various options are available, such as vanilla, hazelnut, or caramel-flavored coffee, which can bring an exciting twist to your Moka pot brew. Be mindful of the grind size and adjust the coffee-to-water ratio accordingly to achieve a balanced and enjoyable cup of flavored coffee.
Exploring alternative brewing methods
While the Moka pot is a beloved classic, there are numerous alternative brewing methods to explore. If you’re feeling adventurous, consider trying pour-over coffee, French press, or even cold brew methods. Each brewing technique offers unique flavors, intensities, and profiles, allowing you to discover new dimensions of the world of coffee. Experimenting with different brewing methods can be a fun and rewarding way to expand your coffee experience.
With these comprehensive steps and tips, you are well-prepared to begin your journey of brewing delicious coffee with your new Bialetti Moka pot. Enjoy the process of preparing and seasoning your pot, experimenting with different coffees and flavors, and savoring the rich aromas and flavors that a well-brewed cup of coffee brings. Cheers to many enjoyable coffee moments ahead!


