Let’s talk about something that we can all agree on – the importance of a clean and well-functioning coffee maker. Whether you’re a daily coffee drinker or just enjoy a hot cup every now and then, knowing the best way to clean your beloved coffee maker can make all the difference in the world. From removing stubborn coffee stains to ensuring that your morning brew tastes as good as ever, we’ve got some helpful tips and tricks to share with you. So grab a mug of your favorite blend and let’s dive into the world of coffee maker cleaning!
This image is property of www.foodandwine.com.
Cleaning the Coffee Pot
Cleaning with Vinegar
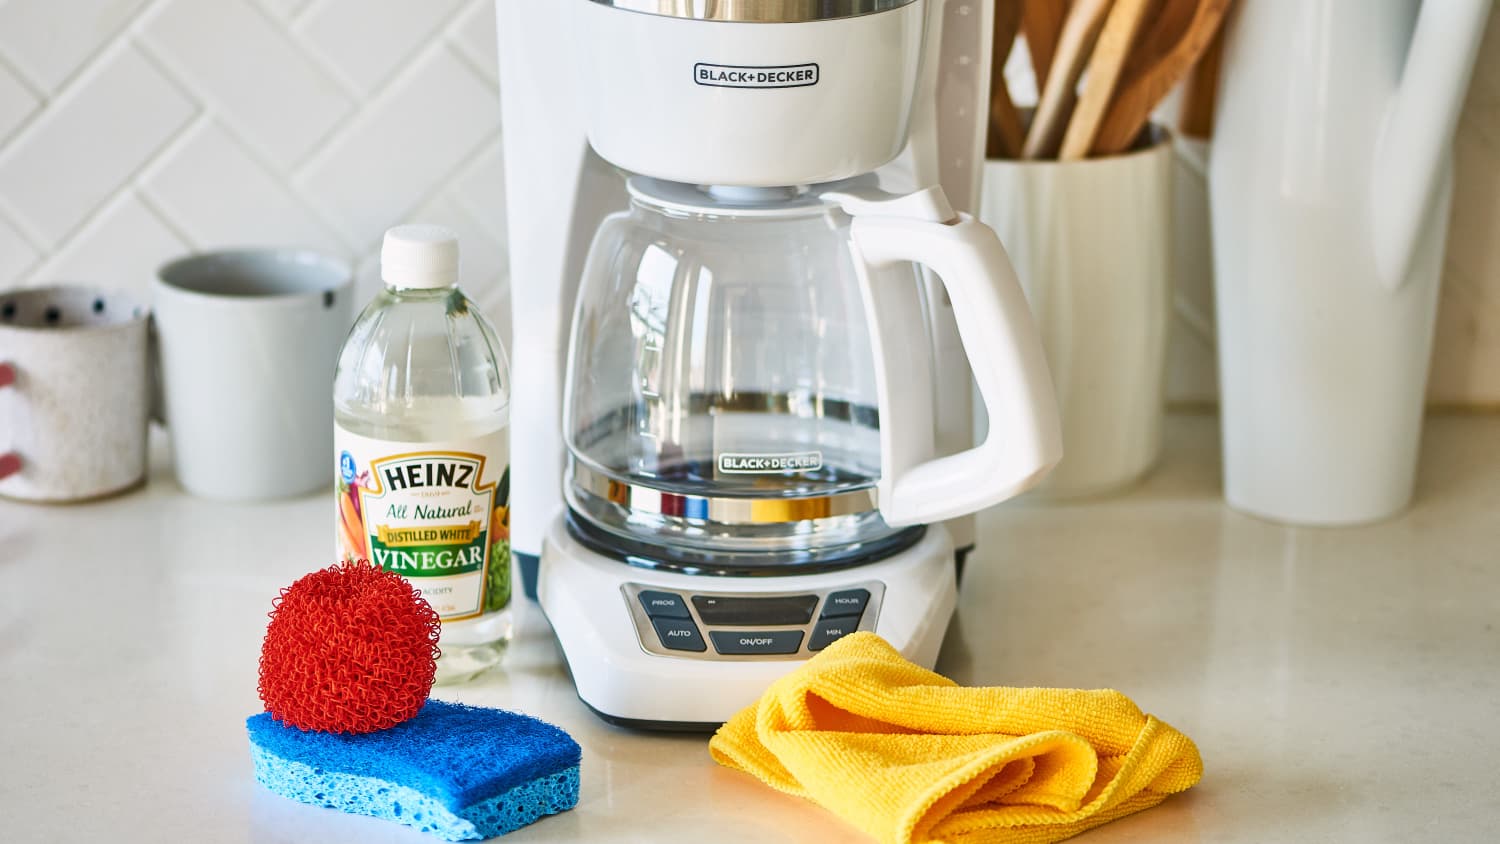
Cleaning the coffee pot with vinegar is a simple and effective method that can remove mineral deposits and stains. First, fill the coffee pot with equal parts vinegar and water. Let the mixture sit in the pot for about 15 minutes to allow the vinegar to dissolve any build-up. Then, scrub the pot with a soft brush or sponge to remove any remaining residue. Rinse the coffee pot thoroughly with water to remove the vinegar odor. This method not only cleans the pot but also helps to descale the machine, improving its performance and extending its lifespan.
Cleaning with Baking Soda
Baking soda is another excellent option for cleaning the coffee pot. To use this method, create a paste by mixing baking soda and water until it forms a thick consistency. Apply the paste to the stained areas of the coffee pot and let it sit for a few minutes. Then, scrub the pot with a sponge or brush, focusing on the areas with stubborn stains. The mild abrasiveness of baking soda helps to remove the stains without scratching the surface. Rinse the coffee pot thoroughly to ensure there is no residue left behind. This natural cleaning method is safe and effective, leaving your coffee pot looking shiny and clean.
Cleaning with Dish Soap
If you prefer using dish soap, it can be a great option for cleaning your coffee pot. Start by filling the sink or a large basin with warm water and add a few drops of dish soap. Submerge the coffee pot in the soapy water and let it soak for a few minutes. Then, use a sponge or brush to scrub away any stains or residue. Pay extra attention to the spout and the handle, as these areas often collect grime. Once you are satisfied with the cleanliness of the coffee pot, rinse it thoroughly to remove any soap residue. This method is gentle yet effective, ensuring that your coffee pot is clean and ready to use.
Cleaning with Citric Acid
For those looking for an alternative to vinegar, citric acid can be a great option for cleaning the coffee pot. Dissolve a tablespoon of citric acid in warm water and pour the solution into the coffee pot. Allow it to sit for about 30 minutes, enabling the citric acid to break down any mineral deposits and stains. After the waiting period, scrub the pot with a brush or sponge, paying close attention to any areas with stubborn residue. Rinse the coffee pot thoroughly with water to remove any remaining citric acid. This method effectively removes build-up and leaves the coffee pot sparkling clean.
Cleaning the Filter Basket
Removing and Rinsing the Filter Basket
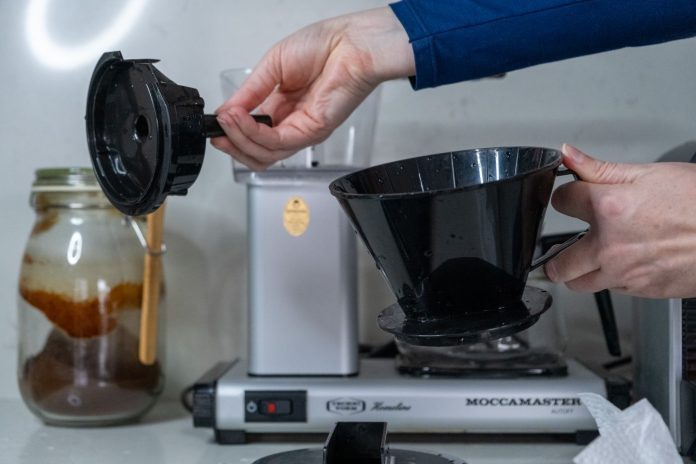
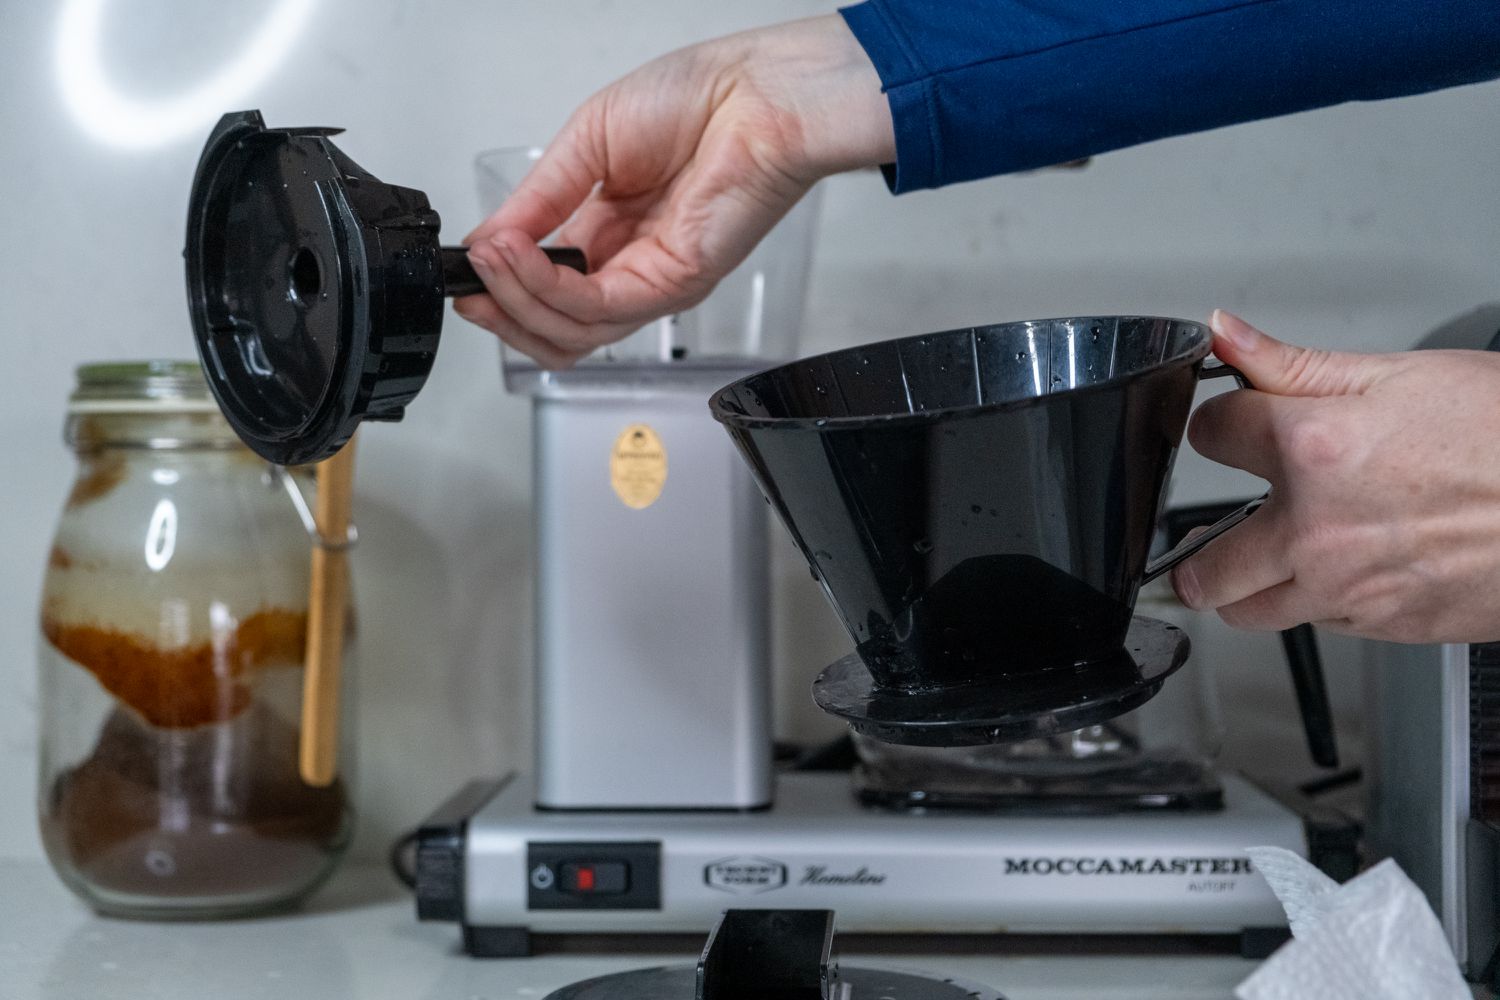
To properly clean the filter basket, start by removing it from the coffee maker. Most filter baskets can be easily detached either by sliding or lifting them out. Once removed, rinse the filter basket under warm water to remove any loose coffee grounds. Use a soft brush or sponge to gently scrub away any remaining residue. Pay attention to the mesh or paper filter area, ensuring it is free from any clogs. After rinsing thoroughly, allow the filter basket to air dry before reinserting it into the coffee maker. Regularly removing and rinsing the filter basket helps maintain optimal coffee quality.
Soaking the Filter Basket in Vinegar Solution
For a deeper clean, soaking the filter basket in a vinegar solution can effectively remove stubborn stains and residue. Fill a container with equal parts vinegar and water and submerge the filter basket. Let it soak for about 30 minutes to allow the vinegar solution to penetrate and break down any build-up. After soaking, use a soft brush to scrub the filter basket, paying extra attention to the mesh or paper filter area. Rinse the basket thoroughly with water to remove any vinegar smell or taste. This method ensures a thorough cleaning, improving both the taste of your coffee and the performance of your coffee maker.
Using Baking Soda and Water to Clean the Filter Basket
Baking soda can also be used to clean the filter basket effectively. Create a paste by mixing baking soda and water until it forms a thick consistency. Apply the paste to the filter basket, focusing on any areas with stains or build-up. Allow the baking soda to sit on the surface for a few minutes to penetrate the grime. Then, use a brush or sponge to scrub the filter basket, making sure to clean the mesh or paper filter area as well. Rinse the basket thoroughly with water to remove any residue and baking soda. This method helps keep the filter basket clean and ensures optimal coffee extraction.
Using Dish Soap and Water to Clean the Filter Basket
If you prefer using dish soap, it can be an effective option for cleaning the filter basket. Fill a basin or sink with warm water and add a few drops of dish soap. Submerge the filter basket in the soapy water and let it soak for a few minutes. Then, use a brush or sponge to scrub away any stains or residue. Pay attention to the mesh or paper filter area, ensuring it is free from any clogs. Rinse the filter basket thoroughly with water to remove any soap residue. This method is gentle on the filter basket while ensuring a thorough clean for optimal coffee brewing.
This image is property of www.homegrounds.co.
Cleaning the Water Reservoir
Emptying and Wiping the Water Reservoir
Before cleaning the water reservoir, it is essential to empty and wipe it down to remove any excess water or debris. Start by unplugging the coffee maker and removing the water reservoir. Carefully pour out any remaining water from the reservoir into the sink. Use a microfiber cloth or a paper towel to wipe the interior of the reservoir, removing any sediment or residue. Ensure that the reservoir is completely dry before placing it back in the coffee maker. This step is crucial to prevent mold or bacteria growth and maintain the cleanliness of the water reservoir.
Removing Mineral Deposits with Vinegar Solution
If there are stubborn mineral deposits in the water reservoir, using a vinegar solution can effectively dissolve them. Create a mixture of equal parts vinegar and water, filling the reservoir about halfway. Allow the solution to sit in the reservoir for approximately 30 minutes to penetrate and break down the mineral deposits. After the waiting period, use a brush or sponge to scrub the reservoir, paying extra attention to any areas with stubborn residue. Rinse the reservoir thoroughly with water to remove any vinegar smell or taste. This method ensures a clean and mineral-free water reservoir.
Using Lemon Juice to Clean the Water Reservoir
Lemon juice can be a natural alternative to vinegar for cleaning the water reservoir. Squeeze the juice of one or two lemons into a container and add an equal amount of water. Pour the lemon juice solution into the water reservoir and let it sit for approximately 30 minutes. The citric acid in the lemon juice will help break down any mineral deposits or residue. After the waiting period, use a brush or sponge to scrub the reservoir, ensuring all areas are thoroughly cleaned. Rinse the water reservoir with water to remove any lemon juice residue. This method leaves the reservoir smelling fresh and clean.
Using Baking Soda and Water to Clean the Reservoir
Baking soda can also be used to clean the water reservoir effectively. Begin by creating a paste by mixing baking soda with water until it forms a thick consistency. Apply the paste to the interior of the reservoir, focusing on any areas with stains or mineral deposits. Allow the baking soda paste to sit for approximately 30 minutes to break down the grime. Then, use a brush or sponge to scrub the reservoir, making sure to clean all surfaces thoroughly. Rinse the reservoir with water to remove any residue and baking soda. This method leaves the water reservoir clean and ready for use.
Cleaning the Water Tank
Draining and Wiping the Water Tank
Before starting the cleaning process, it is essential to drain and wipe the water tank to remove any standing water or debris. Begin by unplugging the coffee maker and removing the water tank. Pour out any remaining water from the tank into the sink and discard any loose debris. Wipe the interior of the water tank with a microfiber cloth or a paper towel, ensuring it is completely dry before continuing with the cleaning process. This step helps maintain the hygiene of the water tank and ensures the cleanliness of the coffee maker.
Removing Lime Scale with Vinegar Solution
If the water tank has built-up lime scale, using a vinegar solution can effectively dissolve and remove it. Fill the sink or a basin with equal parts vinegar and water and submerge the water tank. Allow it to soak for approximately 30 minutes, allowing the vinegar solution to break down the lime scale. After soaking, scrub the water tank with a brush or sponge, paying extra attention to any areas with stubborn deposits. Rinse the water tank thoroughly with water to remove any vinegar smell or taste. This method ensures a lime scale-free and clean water tank.
Using Citric Acid to Clean the Water Tank
Citric acid can be an alternative to vinegar for cleaning the water tank. Dissolve a tablespoon of citric acid in warm water and pour the solution into the water tank. Let it sit for about 30 minutes, allowing the citric acid to break down any mineral deposits. After the waiting period, use a brush or sponge to scrub the water tank, ensuring all surfaces are thoroughly cleaned. Rinse the water tank with water to remove any citric acid residue. This method effectively removes build-up and leaves the water tank clean and ready for use.
Cleaning with Baking Soda and Water
Baking soda can also be used to clean the water tank effectively. Create a paste by mixing baking soda and water until it forms a thick consistency. Apply the paste to the interior of the water tank, focusing on areas with stains or mineral deposits. Allow the baking soda paste to sit for approximately 30 minutes, allowing it to break down the grime. Then, use a brush or sponge to scrub the water tank, ensuring all surfaces are thoroughly cleaned. Rinse the water tank with water to remove any residue and baking soda. This method leaves the water tank clean and ready for use.
This image is property of i.ytimg.com.
Descaling the Coffee Maker
Understanding the Importance of Descaling
Descaling is a crucial maintenance practice for coffee makers as it helps remove mineral deposits that can affect your coffee’s flavor and the longevity of your machine. Over time, minerals found in water, such as calcium and magnesium, can build up and form a hard layer called scale. Descaling your coffee maker regularly helps to prevent clogs, ensures proper water flow, and maintains the optimal brewing temperature. Neglecting to descale your coffee maker can result in coffee that tastes off and a less efficient machine. Therefore, it is vital to understand the importance of descaling and incorporate it into your regular coffee maker care routine.
Descaling with Vinegar
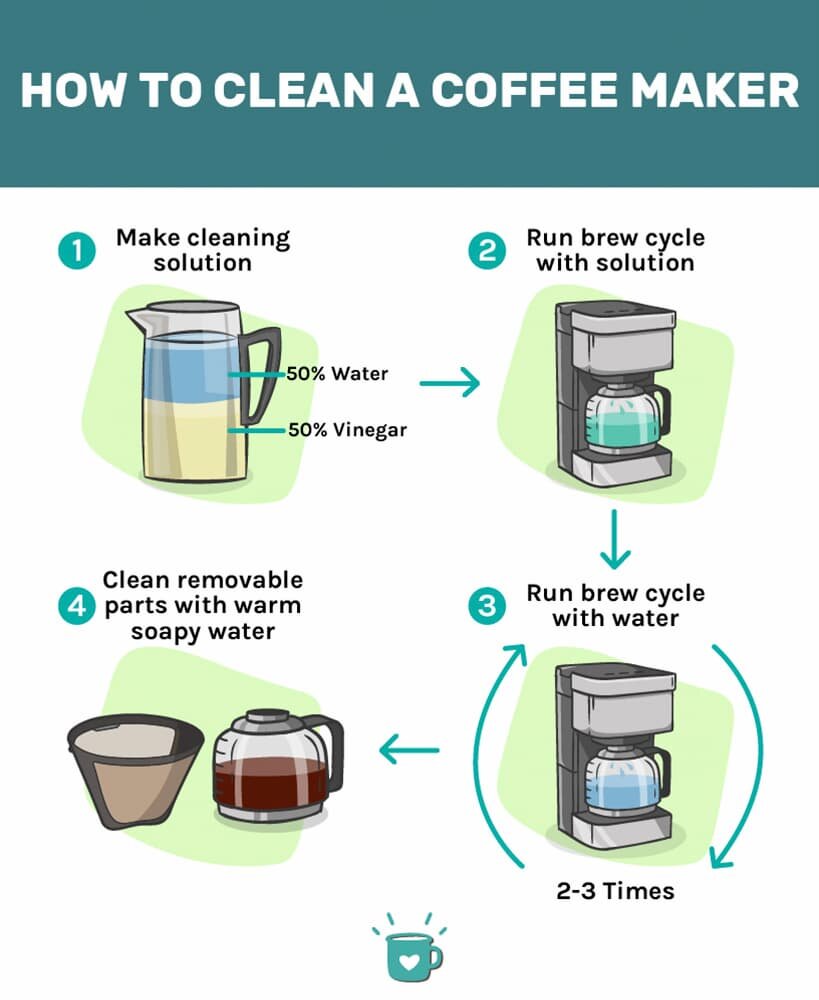
One of the most popular and cost-effective methods of descaling a coffee maker is using vinegar. Start by emptying and cleaning the water reservoir and coffee pot as previously mentioned. Then, mix equal parts vinegar and water and pour the solution into the water reservoir. Run a brewing cycle without coffee grounds, allowing the vinegar solution to flow through the machine. After the cycle is complete, discard the vinegar solution and rinse the water reservoir thoroughly. Run two or more brewing cycles with clean water to remove any vinegar residue and odor. Descaling with vinegar is a simple and effective method to keep your coffee maker in great condition.
Descaling with Citric Acid
If you prefer an alternative to vinegar, using citric acid can effectively descale your coffee maker. Create a solution by dissolving citric acid in warm water, following the instructions on the package. Pour the citric acid solution into the water reservoir and run a brewing cycle without coffee grounds. Allow the solution to sit in the coffee maker for approximately 30 minutes before continuing with a second brewing cycle. Discard the citric acid solution and thoroughly rinse the water reservoir. Run a few brewing cycles with clean water to remove any residue and citric acid taste. This method ensures a well-descaled coffee maker.
Using Commercial Descaling Solutions
Commercial descaling solutions are readily available and provide a convenient option for descaling your coffee maker. Follow the instructions on the packaging to prepare the descaling solution. Typically, this involves diluting the solution with water and pouring it into the water reservoir. Run a brewing cycle without coffee grounds to allow the solution to circulate through the machine. After the descaling cycle is complete, discard the solution and rinse the water reservoir thoroughly. It is important to run multiple brewing cycles with clean water to ensure no residue or taste from the descaling solution remains. Using commercial descaling solutions can be an efficient way to maintain the performance of your coffee maker.
Cleaning the Exterior
Wiping Down the Exterior
Regularly wiping down the exterior of your coffee maker helps to remove dirt, dust, and coffee stains, keeping it looking clean and presentable. Use a damp microfiber cloth or sponge to gently wipe the surface, taking care not to get any electrical components wet. Pay special attention to areas where coffee residue or spills may have occurred, such as the coffee pot platform and control panel. Wiping down the exterior is a quick and easy way to maintain the cleanliness of your coffee maker and ensure it always looks its best.
Removing Stains and Residue
Over time, coffee stains and residue can accumulate on the exterior surfaces of your coffee maker. To remove these stains, create a paste by mixing baking soda and water until it forms a thick consistency. Apply the paste to the stained areas and let it sit for a few minutes to allow the baking soda to work its magic. Then, use a soft brush or sponge to scrub the stains gently. Rinse the area with water and wipe it dry with a clean cloth. This method effectively removes stubborn stains and residue, leaving your coffee maker looking clean and refreshed.
Cleaning Stainless Steel Coffee Makers
Stainless steel coffee makers require special care to maintain their polished appearance. To clean the exterior of a stainless steel coffee maker, start by wiping it down with a damp microfiber cloth to remove any dust or dirt. For fingerprints or smudges, use a stainless steel cleaner specifically designed for appliances. Apply the cleaner to a cloth and gently rub it onto the stainless steel surface, following the manufacturer’s instructions. Be sure to wipe in the direction of the grain to avoid leaving streaks. Once the cleaner has been applied, rinse the cloth with warm water and wipe away any excess residue. This method helps preserve the shine and cleanliness of your stainless steel coffee maker.
Cleaning Glass Carafes
Glass carafes can become stained and develop coffee residue over time. To clean a glass carafe, start by rinsing it with warm water to remove any loose coffee grounds. Then, fill the carafe with warm soapy water and add a few drops of dish soap. Allow the carafe to soak for a few minutes, and then use a sponge or brush to scrub away any stains or residue. Pay extra attention to the spout and the inside bottom of the carafe. Rinse the carafe thoroughly with water to remove any soap residue. This method effectively removes stains and ensures your glass carafe looks clean and transparent.
This image is property of cdn.apartmenttherapy.info.
Cleaning the Drip Tray
Removing and Wiping the Drip Tray
The drip tray catches any excess coffee or water that may flow out during the brewing process. To clean the drip tray, start by removing it from the coffee maker. Most drip trays can be easily detached by sliding or lifting them out. Use a microfiber cloth or a paper towel to wipe away any coffee or water residue. Pay attention to the corners and edges of the drip tray where build-up may occur. Rinse the drip tray with warm water to remove any remaining residue and wipe it dry before reinserting it into the coffee maker. Cleaning the drip tray regularly helps prevent the growth of bacteria and keeps your coffee maker clean and hygienic.
Soaking the Drip Tray in Warm Soapy Water
For a thorough cleaning of the drip tray, soak it in warm soapy water. Fill a basin or sink with warm water and add a few drops of dish soap. Submerge the drip tray in the soapy water and let it soak for about 15 minutes to loosen any dried-on residue. After soaking, use a brush or sponge to scrub the drip tray, paying extra attention to any stubborn stains. Rinse the drip tray thoroughly with water to remove any soap residue. This method ensures a deep clean of the drip tray, ensuring optimal cleanliness and functionality of your coffee maker.
Using Vinegar Solution to Clean the Drip Tray
Vinegar is an effective natural cleaner that can be used to clean the drip tray. Fill a container with equal parts vinegar and water and submerge the drip tray. Let it soak for about 15 minutes to allow the vinegar solution to break down any residue or stains. After soaking, use a brush or sponge to scrub the drip tray, paying extra attention to any stubborn build-up. Rinse the drip tray thoroughly with water to remove any vinegar smell or taste. This vinegar solution method effectively removes residue and ensures a clean drip tray.
Using Baking Soda and Water to Clean the Drip Tray
Baking soda can be used to clean the drip tray and eliminate odors. Create a paste by mixing baking soda and water until it forms a thick consistency. Apply the paste to the drip tray, focusing on any areas with stains or residue. Allow the baking soda paste to sit for a few minutes to break down the grime. Then, use a brush or sponge to scrub the drip tray, ensuring all surfaces are thoroughly cleaned. Rinse the drip tray with water to remove any residue and baking soda. This method effectively removes stains and odors from the drip tray, leaving it clean and fresh.
Deep Cleaning the Coffee Maker
Disassembling the Coffee Maker
For a thorough deep cleaning, it may be necessary to disassemble certain parts of the coffee maker. Before starting the disassembly process, refer to the manufacturer’s instructions to ensure you disassemble and reassemble the coffee maker correctly. Typically, removable parts include the filter basket, water reservoir, drip tray, and coffee pot. Carefully remove these components, taking note of each part’s placement and orientation. This step allows for better access and thorough cleaning of individual parts, ensuring maximum cleanliness and performance of your coffee maker.
Soaking Components in Vinegar Solution
After disassembling the coffee maker, soaking the removable components in a vinegar solution can help remove stubborn residue and build-up. Fill a sink or basin with equal parts vinegar and water and place the disassembled parts in the solution. Allow them to soak for approximately 30 minutes to an hour, depending on the level of build-up. The vinegar solution will help break down mineral deposits and stains, making them easier to remove. After soaking, use a brush or sponge to scrub the components, ensuring thorough cleaning. Rinse each part thoroughly with water to remove any vinegar smell or taste.
Scrubbing and Brushing Parts
Once the removable components have been soaked, it is essential to scrub and brush each part to remove any remaining residue. Use a brush or sponge to scrub the filter basket, water reservoir, and drip tray, paying extra attention to any stubborn stains or build-up. Employ a gentle but firm motion, ensuring that all surfaces are adequately cleaned. For tight or small spaces, use toothbrushes or pipe cleaners to access hard-to-reach areas. Scrubbing and brushing each part thoroughly will ensure that your coffee maker is free from residue and operating at its best.
Rinsing and Reassembling the Coffee Maker
After scrubbing and brushing each component, rinse them thoroughly with clean water to remove any remaining residue. This step is crucial to ensure that no cleaning agents or particles are left behind that could potentially affect the taste and performance of your coffee maker. Once all the parts are rinsed, carefully reassemble the coffee maker, following the manufacturer’s instructions. Take note of each part’s correct placement and orientation. Ensure that all parts fit securely and that any seals or gaskets are properly aligned. When the coffee maker is reassembled, it is ready to be used, maintaining optimal cleanliness and functionality.
This image is property of www.maidforyou.com.au.
Regular Maintenance Practices
Emptying and Cleaning the Carafe Daily
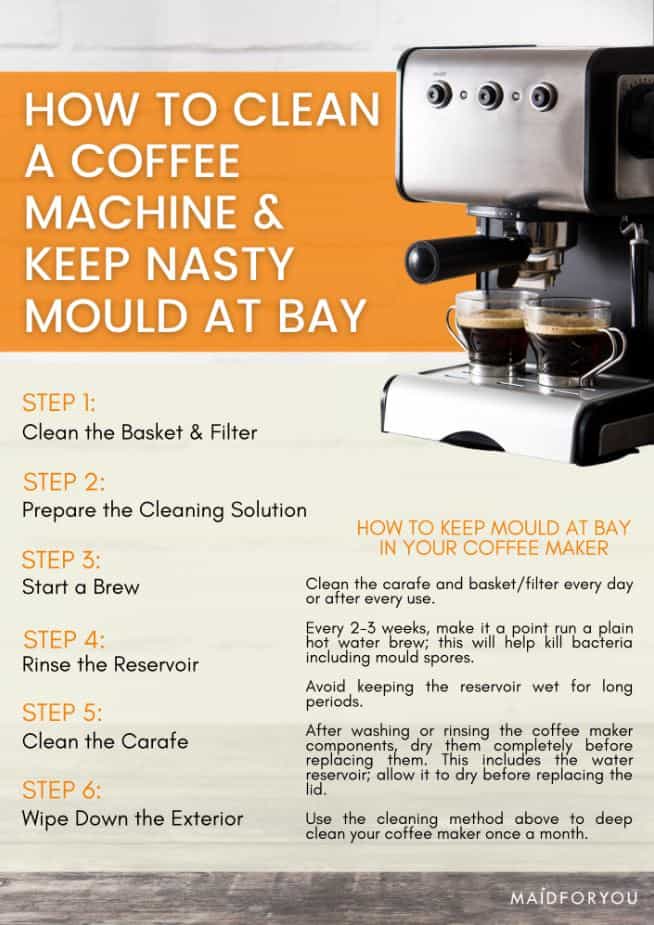
To maintain optimal coffee quality and prevent the growth of bacteria, it is essential to empty and clean the carafe daily. Start by pouring any remaining coffee into a sink or compost bin. Then, fill the carafe with warm soapy water and add a few drops of dish soap. Use a sponge or brush to scrub the interior of the carafe, paying extra attention to the spout and the bottom. Rinse the carafe thoroughly with water, ensuring all soap residue is removed. Finally, allow the carafe to air dry or wipe it dry with a clean cloth. Cleaning the carafe daily ensures a fresh and pleasant-tasting cup of coffee.
Rinsing and Washing the Filter Basket Regularly
Rinsing and washing the filter basket regularly is essential to prevent coffee residue from accumulating and affecting the flavor of your brew. After each use, remove the filter from the basket and tap it into the compost or trash to remove any loose grounds. Rinse the filter under warm water to remove any remaining coffee residue. If necessary, use a soft brush to gently scrub the filter, ensuring all residue is removed. Wash the filter basket with warm soapy water and rinse it thoroughly. Allow both the filter and the basket to air dry before reuse. Regularly rinsing and washing the filter basket ensures optimal coffee extraction and maintains the cleanliness of your coffee maker.
Wiping Down the Exterior Weekly
To keep your coffee maker looking clean and presentable, it is advisable to wipe down the exterior weekly. Use a damp microfiber cloth or sponge to gently wipe all surfaces, removing any dust, dirt, or fingerprints. Pay special attention to areas where coffee residue may have accumulated, such as the coffee pot platform and control panel. Wiping down the exterior of your coffee maker regularly prevents the build-up of grime and maintains its appearance. Additionally, this practice helps identify any maintenance or cleaning needs, ensuring your coffee maker operates at its best.
Descaling Every Few Months
Regular descaling is essential to maintain the performance and lifespan of your coffee maker. Depending on the hardness of your water and usage frequency, a general guideline is to descale the coffee maker every two to three months. Follow the descaling methods outlined earlier, using either vinegar, citric acid, or a commercial descaling solution. Regular descaling removes mineral deposits, improves water flow, and ensures optimal brewing temperature. By integrating descaling into your coffee maker care routine, you can enjoy better-tasting coffee and extend the life of your machine.
Tips for Optimal Coffee Maker Care
Read the Manufacturer’s Instructions
Before using and cleaning your coffee maker, it is crucial to read the manufacturer’s instructions. Each coffee maker may have specific care instructions and recommendations that should be followed to ensure proper operation and longevity. Familiarize yourself with the instructions, including any cleaning guidelines and recommended maintenance practices. By following the manufacturer’s instructions, you can avoid damaging your coffee maker and optimize its performance.
Use Filtered Water
Using filtered water instead of tap water can help reduce mineral deposits and maintain the cleanliness of your coffee maker. Tap water often contains minerals such as calcium and magnesium, which can build up over time and affect the taste and performance of your coffee maker. Filtering your water removes these minerals, resulting in a cleaner brew and reducing the frequency of descaling. Whether using a water filter pitcher, faucet filter, or built-in filtration system, filtering your water is a simple and effective way to care for your coffee maker.
Avoid Using Harsh Chemicals
When cleaning your coffee maker, it is important to avoid using harsh chemicals or abrasive cleaners. These can damage the components and leave behind harmful residues that can affect the taste and performance of your coffee. Stick to mild cleaners such as vinegar, citric acid, dish soap, or baking soda, which are safe and effective for coffee maker maintenance. Additionally, avoid using bleach or other strong cleaning agents that may be tempting for tough stains. Harsh chemicals can corrode the coffee maker and potentially contaminate your coffee, so it is best to choose gentle cleaning solutions.
Clean Coffee Maker Parts Separately
When cleaning your coffee maker, it is essential to clean the individual parts separately to ensure thorough cleaning. Each part, such as the filter basket, water reservoir, and carafe, should be cleaned and rinsed individually to prevent cross-contamination and maintain optimal cleanliness. This practice helps remove any residue, coffee oils, or impurities that may have accumulated, ensuring the best possible coffee taste and quality. Cleaning coffee maker parts separately also prevents any cleaning agents or particles from affecting other components of the machine. By taking the time to clean each part individually, you can ensure a well-maintained coffee maker.


