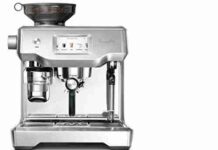
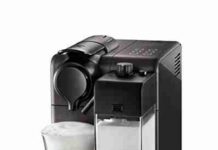
Coffee machines are a beloved staple in countless kitchens, elevating our mornings with a much-needed dose of caffeine. But have you ever wondered how to properly clean these marvelous machines? Maintaining a clean and well-functioning coffee machine is essential for ensuring a delicious brew every time. In this article, we will guide you through the step-by-step process of cleaning your coffee machine, leaving it sparkling clean and ready to brew your next cup of joe. So say goodbye to stale residues and hello to a fresh, invigorating coffee experience!
Regular Cleaning
Regular cleaning of your coffee machine is essential to ensure that your coffee always tastes fresh and delicious. Here are some steps to follow for regular cleaning:
Gather Your Supplies
Before you start cleaning your coffee machine, make sure you have all the necessary supplies. This may include dish soap, water, a soft sponge or brush, and a towel. Having all your supplies ready will make the cleaning process much more efficient.
Remove and Rinse the Filter
The first step in regular cleaning is to remove and rinse the filter. This will help remove any residual coffee grounds and oils that may have accumulated. Simply remove the filter from the machine, rinse it under running water, and set it aside to dry.
Clean the Carafe
Next, clean the carafe of your coffee machine. This is where the brewed coffee is collected, so it’s important to keep it clean to prevent any buildup of stains or residue. Wash the carafe with warm soapy water, rinse it thoroughly, and dry it before placing it back in the machine.
Clean the Exterior
Lastly, don’t forget to clean the exterior of your coffee machine. Use a damp cloth or sponge to wipe down the surface, removing any dust or spills. Take extra care when cleaning any buttons or knobs, ensuring that no water seeps into the internal components of the machine.
Deep Cleaning
In addition to regular cleaning, it’s important to perform deep cleaning of your coffee machine to remove any built-up mineral deposits and ensure optimal performance. Here’s how you can deep clean your coffee machine:
Descale the Coffee Machine
Over time, mineral deposits from the water can build up in your coffee machine and affect its performance. To descale the machine, follow the manufacturer’s instructions to mix a solution of water and descaling cleaner. Run this solution through the coffee machine according to the instructions, which usually involves brewing and discarding several cycles of the solution.
Clean the Spray Head
The spray head is responsible for evenly distributing water over the coffee grounds during the brewing process. Over time, it can become clogged with coffee residue. To clean the spray head, simply remove it from the machine and rinse it under running water. Use a soft brush to gently scrub away any stubborn residue.
Clean the Water Reservoir
The water reservoir is where you pour in fresh water to make your coffee. It can accumulate mineral deposits and other impurities over time. To clean the water reservoir, remove it from the machine (if possible) and wash it with warm soapy water. Rinse it thoroughly to remove any soap residue before placing it back in the machine.
Remove and Clean the Brew Basket
The brew basket is where you place the coffee grounds. It can become clogged with oils and residue from the coffee. To clean the brew basket, remove it from the machine and rinse it under running water. Use a soft brush to scrub away any residue, and make sure to clean any filters or screens as well. Allow the brew basket to dry before placing it back in the machine.
Cleaning Specific Parts
Different types of coffee machines have different parts that may need additional cleaning. Here are some specific parts you may need to clean:
Cleaning the Grinder
If your coffee machine has an attached grinder, it’s important to clean it regularly to maintain its performance. Consult the manufacturer’s instructions for specific cleaning recommendations. In general, you’ll need to remove any coffee beans from the hopper, clean the grinding chamber with a brush, and wipe down the exterior.
Cleaning the Milk Frother
For coffee machines with a milk frother, proper cleaning is crucial to prevent the buildup of milk residue and bacteria. Follow the manufacturer’s instructions for disassembling and cleaning the frother. This may involve soaking the parts in warm soapy water, rinsing them thoroughly, and wiping them dry before reassembly.
Cleaning the Drip Tray
The drip tray collects any excess coffee or water that may drip from the machine during brewing. It can become dirty and stained over time, so it’s important to clean it regularly. Remove the drip tray from the machine and wash it with warm soapy water. Rinse it thoroughly, ensuring that all residue is removed, before placing it back in the machine.
Cleaning the Water Tank
The water tank holds the fresh water that is used to make your coffee. Over time, it can accumulate mineral deposits and impurities. To clean the water tank, remove it from the machine and wash it with warm soapy water. Rinse it thoroughly to remove any soap residue, and make sure to dry it completely before placing it back in the machine.
Using Vinegar for Cleaning
Vinegar is a natural and effective cleaning agent that can be used to clean your coffee machine. Here’s how you can use vinegar for cleaning:
Prepare a Vinegar Solution
To prepare a vinegar solution, mix equal parts of white vinegar and water. The amount of solution you’ll need depends on the size of your coffee machine, so refer to the manufacturer’s instructions for guidance.
Run the Vinegar Solution
Once the vinegar solution is prepared, pour it into the water reservoir of your coffee machine. Start a brewing cycle, allowing the vinegar solution to run through the machine. This will help remove any mineral deposits and bacteria that may have accumulated.
Rinse the Machine
After running the vinegar solution through the machine, it’s important to thoroughly rinse the machine to remove any vinegar and residue. Fill the water reservoir with fresh water and run a few brewing cycles with just water to ensure that all traces of vinegar are eliminated. This will ensure that your coffee doesn’t have any unwanted flavors.
Using Commercial Coffee Machine Cleaners
Commercial coffee machine cleaners are specifically formulated to remove tough stains, oils, and mineral deposits from your coffee machine. Here’s how you can use them effectively:
Read and Follow the Instructions
Before using a commercial coffee machine cleaner, carefully read and follow the instructions provided by the manufacturer. Different cleaners may have different dilution ratios or application methods, so it’s important to follow the directions to ensure safe and effective cleaning.
Mix and Apply the Cleaner
Prepare the cleaning solution according to the instructions on the packaging. This may involve diluting the cleaner with water or using it undiluted for tough stains. Apply the cleaner to the appropriate parts of your coffee machine, such as the carafe, brew basket, or spray head. Use a soft sponge or brush to scrub away any stains or residue.
Rinse Thoroughly
After applying the cleaner, thoroughly rinse the machine with fresh water to remove any traces of the cleaner. Make sure that all parts are rinsed properly, and no residue is left behind. This will ensure that your coffee machine is safe to use and won’t leave any unwanted flavors in your coffee.
Cleaning a Single Serve Coffee Machine
Single serve coffee machines, also known as pod coffee machines, require regular cleaning to maintain their performance. Here’s how you can clean a single serve coffee machine:
Remove and Clean the Removable Parts
Start by removing any removable parts, such as the drip tray, pod holder, and water reservoir. Wash these parts with warm soapy water, rinse them thoroughly, and dry them before placing them back in the machine. Make sure to clean any filters or screens as well.
Clean the Needle
The needle of a single serve coffee machine pierces the pod to create the brewing process. Over time, it can become clogged with coffee residue. Use a soft brush or toothbrush to gently clean the needle, removing any buildup. Make sure to clean it from both sides to ensure proper functionality.
Clean the Water Tank
The water tank of a single serve coffee machine can accumulate mineral deposits and impurities. Remove the water tank from the machine and wash it with warm soapy water. Rinse it thoroughly, making sure all residue is removed, before placing it back in the machine.
Run Cleaning Cycles
Many single serve coffee machines have a pre-programmed cleaning cycle. Refer to the manufacturer’s instructions to activate this cycle. It typically involves running plain water through the machine to flush out any remaining residue. Make sure to empty the drip tray and discard any used pods during the cleaning cycle.
Cleaning a Drip Coffee Machine
Drip coffee machines are one of the most common types of coffee machines found in households. Here’s how you can clean a drip coffee machine:
Remove and Clean the Filter Basket
Start by removing the filter basket from the machine. Most filter baskets are removable and can be washed with warm soapy water. Rinse it thoroughly, ensuring that all residue is removed, and place it back in the machine once it is completely dry. If the filter basket is not removable, use a soft brush to clean it.
Descale the Machine
To descale a drip coffee machine, follow the steps mentioned earlier for deep cleaning. This will help remove any mineral deposits and ensure that your machine functions properly.
Clean the Carafe and Lid
The carafe and lid of a drip coffee machine can become stained or accumulate residue over time. Wash the carafe and lid with warm soapy water, rinse them thoroughly, and dry them before placing them back in the machine.
Wipe the Exterior
Lastly, wipe down the exterior of your drip coffee machine with a damp cloth or sponge. Pay attention to any buttons, knobs, or crevices, ensuring that no water seeps into the internal components of the machine. This will help keep your machine looking clean and well-maintained.
Cleaning an Espresso Machine
Espresso machines require regular cleaning to maintain their performance and ensure that your espresso shots taste perfect. Here’s how you can clean an espresso machine:
Clean the Portafilter and Filter Basket
The portafilter and filter basket are crucial components of an espresso machine. Remove the portafilter and filter basket from the machine and wash them with warm soapy water. Rinse them thoroughly and make sure all residue is removed. Use a soft brush or toothbrush to clean any hard-to-reach areas.
Descale the Machine
To descale an espresso machine, refer to the steps mentioned earlier for deep cleaning. This will help remove any mineral deposits and ensure that your machine continues to produce high-quality espresso.
Clean the Steam Wand
The steam wand of an espresso machine allows you to froth milk for cappuccinos and lattes. It can become clogged with milk residue and bacteria. After each use, wipe the steam wand with a damp cloth to remove any milk residue. If necessary, remove the steam wand and soak it in warm soapy water to dissolve any stubborn residue.
Clean the Water Tank
The water tank of an espresso machine can accumulate impurities over time. Remove the water tank from the machine and wash it with warm soapy water. Rinse it thoroughly, making sure all soap residue is removed, before placing it back in the machine.
Cleaning a French Press
French presses offer a unique and flavorful brewing method. To ensure that your French press continues to produce delicious coffee, regular cleaning is essential. Here’s how you can clean a French press:
Disassemble the Coffee Plunger
The first step in cleaning a French press is to disassemble the coffee plunger. This typically involves separating the plunger and the filter assembly from the glass beaker.
Wash the Plunger Parts
Wash the plunger and filter assembly with warm soapy water, making sure to remove any residual coffee grounds. Rinse them thoroughly, ensuring all soap residue is removed, before allowing them to dry.
Clean the Glass Beaker
Wash the glass beaker of your French press with warm soapy water, using a soft sponge or brush to remove any coffee stains. Rinse it thoroughly, making sure all residue is removed, and dry it before reassembling the French press.
Reassemble the French Press
Once all the parts are clean and dry, reassemble your French press. Make sure the plunger and filter assembly are fitted securely into the glass beaker. Your French press is now ready to brew delicious coffee once again.
Tips for Efficient Cleaning
Cleaning your coffee machine can become a quick and efficient process if you follow these tips:
Regularly Empty and Rinse Used Grounds
After each use, make sure to empty and rinse the coffee grounds from the filter or brew basket. This will prevent any buildup of residue and make the cleaning process easier.
Clean Spills Immediately
If you accidentally spill coffee or water on your coffee machine, make sure to clean it immediately. This will prevent any stains or damage from occurring.
Use Soft Sponges or Brushes
When cleaning your coffee machine, use soft sponges or brushes to prevent scratching the surfaces. Abrasive materials can damage the finish of your machine.
Avoid Using Harsh Chemicals
While it may be tempting to use strong chemicals for tough stains, it’s best to avoid them. Harsh chemicals can damage the internal components of your coffee machine and leave behind unwanted flavors in your coffee.
By following these cleaning tips and regularly maintaining your coffee machine, you can ensure that it continues to brew delicious coffee for many years to come. Cheers to a clean and enjoyable coffee experience!


